|
Deglazing the brake pads
The stock Mayhem brakes are very powerful and resist fading even in long mains, but to maintain this braking performance it's necessary to periodically deglaze the brake pads. The procedure is simple. With the brake pads removed spray some motor spray (like Dynamite's DYN550) onto a clean rag and wipe away the dark glazed area from the pad. You'll find the glazing comes off easily with motor spray and your braking power will return to normal after the pads are deglazed. I deglaze my pads after two full race weekends or whenever I notice that braking power is reduced. This only takes about five minutes, thanks to a two-piece center diff mount that allows the brakes to be easily removed via 4 screws from the top.
 |
| |
 |
Replace the rear body mount screws with 3x16mm screws
The rear body mount is attached to the shock tower and wing support with 12mm long screws. In a hard crash it's not uncommon for the 12mm rear body mount screws to come loose. Replacing them with longer 16mm screws (SWK2032) prevents this, even in the most severe crashes. Future production Mayhems will include these longer 16mm screws installed.
On rough surfaces try 3000wt. oil in the rear differential
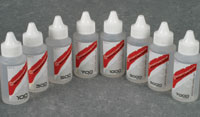
On many tracks the acceleration zones (generally the area just exiting the corners) become rough and rutted due to 1/8-scale buggies torturing these areas under heavy acceleration. We've recently discovered that by replacing the stock 1000wt. rear differential lube with 3000wt., stability is greatly improved under acceleration through these rough sections with minimal loss of steering. On some tracks where these zones are mildly rough, I mix 1000 and 3000wt. at various ratios based on just how rough the track is. Sportwerks offers precision graded differential lube in weights ranging from 100wt. through 50,000wt. Having a range of diff lubes in your pit box is a "must have" to optimize handling and maintain diff action. I replace all the diff lubes with fresh fluids after about every six race weekends.
Replace the rear camber screws with 3x16mm screws and locknuts
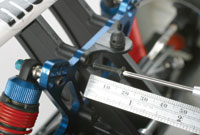
The rear inner camber links are normally fastened to the shock tower using 3x12mm screws. These screws must be securely fastened with thread-lock each time they are removed to change the inner camber-link positions. By using longer 3x16mm screws (SWK2032), threads extend past the ball allowing a 3mm locknut to be used to secure the ball in place preventing the need for thread-lock. Using the longer 3x16mm screw and 3mm locknuts more securely lock the screw and ball in place plus the inner camber-link position changes are much easier.
Shock and CVD Boots
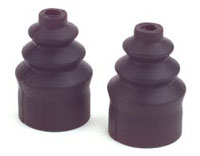
One of the best investments for your Mayhem™ is shock and CVD boots. CVD boots from Dynamite® will greatly extend the life of your CVDs by keeping out abrasive dirt plus they allow the use of grease on the CVD joints, further reducing friction and wear. Shock boots available from GS Racing protect shock shafts and prevent grit from finding its way into fragile O-ring seals. These are must have items that will pay for themselves many times over by increasing the life of your CVDs and shock shafts and are available in several colors.
|
|
|
|
General Silicon Shock Boots | |
|
DYN7687 |
black |
|
GSC34002 |
black |
|
DYN7687B |
blue |
|
GSC34002FG |
green |
|
DYN7687P |
purple |
|
GSC34002FP |
pink |
|
DYN7687R |
red |
|
GSC34002FY |
yellow |
|
|
|
|
GSC34002PR |
purple |
|
|
|
|
GSC34002TBL |
blue | |
 |
Replace the steering rack pivot screws with 3x16mm screws and locknuts
The steering rack attaches to the bell crank bushings using 3x10mm screws. Thread-lock must be used but it's easy to accidentally get thread-lock between the bushing and the nylon bell crank preventing smooth operation. Using a longer 3x16mm screw and a 3mm lock nut prevents the need for thread-lock and more securely fastens the bushing to the steering rack.
|