|
|
SPECS |
|
MANUFACTURER: Hangar 9
DISTRIBUTOR: Horizon Hobby Inc.
TYPE: 3D aerobatic ARF
LENGTH: 68.5 in.
WINGSPAN: 69.5 in.
WING AREA: 1,108 sq. in.
AIRFOIL: symmetrical
WEIGHT: 8.6 lb.
WING LOADING: 17.55 oz./sq. ft.
ENGINE REQ’D: .61 to 1.00 2-stroke or .91 to 1.00 4-stroke
RADIO REQ’D: 4-channel w 6/servos (rudder, elevator, throttle and 2 aileron)
PRICE: $209.99 |
|
COMMENTS |
|
The FuntanaS 90 is a very capable 3D ARF. The kit includes all the hardware, but I had to replace the aileron pushrods. Both the Sunday flier and the “hot-dog” pilot looking to push the 3D envelope will enjoy the FuntanaS’s flight characteristics. |
|
HIGHLIGHTS |
> Unique design > Well-thought-out instruction manual and drawings > Excellent flight qualities |
|
TEST GEAR |
RADIO EQUIPMENT USED: Futaba 9Z transmitter
(3) S9102 servos
(3) S3004 servos
R149DP PCM receiver
ENGINE USED: Saito FA-100 GK 4-stroke
FUEL USED: Powermaster YS 20/20
PROPS USED: APC 16x4W |
|
|
WING ASSEMBLY
Wing assembly for most ARF models begins with the wing, and the FuntanaS is no exception. I will caution you to carefully inspect all the ribs in each wing panel. Mine had several that were cracked between the lightening holes (probably caused during shipping). I simply dripped a few drops of Zap thin CA onto the cracked ribs. Be sure to carefully check the rib adjacent to the aileron servo mount; if this rib separates, the servo mount will be compromised, and control will suffer.
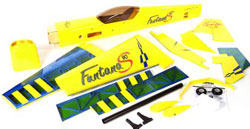
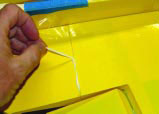
After I hinged the ailerons to the wing panels, I sealed the hinge gap before adding the control horns; it’s a lot easier to add the seal without having to work around the horns. Also, be careful not to allow a thick buildup of CA to develop on the hinges between the ailerons and wing; this would eventually cause a hinge failure.
 When I hooked up the aileron linkages, I didn’t use the supplied pushrods; the clevises were sloppy on the threads, so I used hardware that I had on hand. The hole for the wing-retaining nylon bolt in the fuselage was slightly off location. I needed to enlarge it about 1⁄32 inch. After I had fitted the wing, I aligned and glued the wing fillets to the trailing edge. I applied a coat of carnauba wax adjacent to the bonding surfaces on the fuselage for easier removal of the excess Z-Poxy that oozes out. I let the epoxy cure to a rubber state and then peeled it off. When I hooked up the aileron linkages, I didn’t use the supplied pushrods; the clevises were sloppy on the threads, so I used hardware that I had on hand. The hole for the wing-retaining nylon bolt in the fuselage was slightly off location. I needed to enlarge it about 1⁄32 inch. After I had fitted the wing, I aligned and glued the wing fillets to the trailing edge. I applied a coat of carnauba wax adjacent to the bonding surfaces on the fuselage for easier removal of the excess Z-Poxy that oozes out. I let the epoxy cure to a rubber state and then peeled it off.
TAIL FEATHERS
Next, I installed the horizontal stab. Before doing this, I thought that it would be easier to work on the model with the landing gear installed. When trimming the covering film from the center section of the stab, be careful not to cut into the underlying balsa. I used 30-minute epoxy to secure the stab.
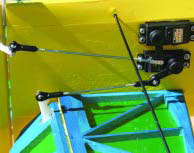 Next, install the stab carbon-fiber support rods. I fitted them but waited until after I had installed the rudder/elevator servos and pushrods. The carbon-fiber rods get in the way when you put in the servos and linkages. The next step is to glue the vertical fin and then the tailwheel assembly. Hinging the rudder and elevators is very straightforward and goes quickly. To make the three little holes for the control horns in the control surfaces, I used a drill press. This ensures alignment between the horn and the nut plate on the opposite side of the control surface. After I had installed the servos, I verified that extreme downward deflection of the elevator would not interfere with the rudder control horn. Next, install the stab carbon-fiber support rods. I fitted them but waited until after I had installed the rudder/elevator servos and pushrods. The carbon-fiber rods get in the way when you put in the servos and linkages. The next step is to glue the vertical fin and then the tailwheel assembly. Hinging the rudder and elevators is very straightforward and goes quickly. To make the three little holes for the control horns in the control surfaces, I used a drill press. This ensures alignment between the horn and the nut plate on the opposite side of the control surface. After I had installed the servos, I verified that extreme downward deflection of the elevator would not interfere with the rudder control horn.
FINAL DETAILS
The next steps cover the installation of the fuel system and engine. The supplied fuel tank is large enough to allow at least a 10-minute flight. I used a 3-line system with the Saito 100 to ease filling the tank. Keep the location of the tank in mind when you drill the hole for the throttle-pushrod outer tube; you don’t want to puncture the tank! The manual clearly shows how to neatly install the engine and trim the cowl. After the engine has been fitted, install the throttle pushrod and servo. I bonded the throttle-pushrod outer tube to the bottom of the fiberglass wing tube in the fuselage. The height of the throttle servo will determine whether this works for you. Now install the tank, pad the sides with foam, and secure it from the back with a brace across the fuselage.
When you have fitted and trimmed the cowl, glue the canopy into place. Then place the receiver and battery in the fuselage to achieve the proper CG. The instructions indicate a measurement of 71⁄8 inches from the wing’s leading edge with an empty tank, and this actually was a good starting point. After I had secured the radio gear, I checked that the controls moved freely and in the proper directions. The recommended control throws worked well for the first flights. I was ready to put the FuntanaS through its paces!
CONCLUSION
The Hangar 9 FuntanaS 90 is hands-down the finest model I’ve ever assembled; you get a lot of model for the price. The flight qualities will make you want to buy two of them so you’ll always have one ready to go. Two thumbs up for the FuntanaS 90 3D ARF!
|
IN THE AIR |
|
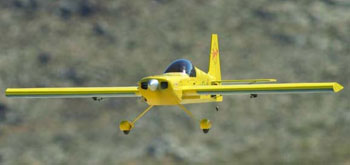
For all flights, the Saito 100, Powermaster YS 20/20 fuel and APC 16x4W prop performed beautifully in combination. When I properly primed the engine, it typically started on one flip.
CONTROL THROWS
- Aileron: +3.75 in. –4 in. (high); +2 in. –2 in. (low); expo: 35%
- Elevator: +5 in. –5 in. (high); +1.75 in. –1.75 in. (low); expo: 30%
- Rudder: +4.5 in. – 4.5 in. (high);+ 4.5 in. – 4.5 in. (low); expo: 40%
GENERAL FLIGHT CHARACTERISTICS
Stability: slow-speed and high-speed neutral stability are awesome, thanks to the tapered constant-thickness airfoil. Control response: the very large control surfaces give the FuntanaS unbelievable control authority, even at very low speeds. The light construction also contributes to its no-holds-barred performance.
Tracking: you would typically fly this plane at low power settings and not very fast. It also has very light wing loading; it will bounce around a bit if the air is choppy.
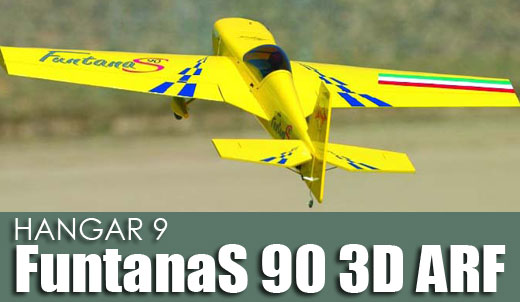
Aerobatics: the FuntanaS 90 is an extreme 3D aerobatic airplane with extreme potential for performing the most creative 3D moves.
Glide performance: this plane is so light that you might become impatient as you wait for it to glide in on a landing.
Stall characteristics: this is one of the most stall-resistant planes I have flown; it just keeps slowing down and pitching nose-up.
PILOT DEBRIEFING
The FuntanaS 90 is one of the most enjoyable planes I have flown! It is intended as an all-out 3D flyer and has one of the fastest roll rates I have experienced. Doing rolling harriers with high-rate aileron can be a challenge if your elevator and rudder servos are not fast enough to keep up. There is a bit of yaw-induced coupling in roll and pitch. Due to the long tail moment, some pitch-intensive maneuvers are a bit impaired (e.g., waterfalls). The wing is very tolerant of high-angle-of-attack conditions that make it resistant to snap-roll maneuvers. I had difficulty getting it to do two snaps on a vertical upline. I got the best snaps during knife-edge flight due, I suppose, to the already high yaw condition of knifeedge flight. I anticipate keeping the FuntanaS for a long time; it’s simply the best bang-for-your-buck aerobatic ARF there is! | |