By Brian Hueffmeier, Team JR
 |
| |
| |
 |
| |
| |
 |
| |
| |
 |
| HAN100- Heat Gun |
| |
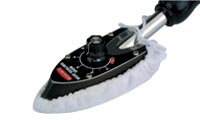 |
| Sealing Iron & Sock |
| |
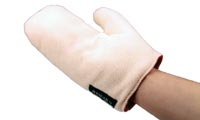 |
| HAN150- Covering Glove |
| |
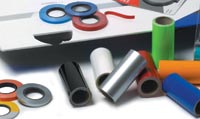 |
| For precision detailing use Hangar 9's Ultratrim and UltraStripe |
| |
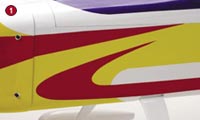
In the eight years I’ve been building custom aircraft, I’ve worked with some very challenging trim schemes. Some are one-of-a-kind schemes developed by top designers, my customers created some, and others were hatched out of my own late night idea-searching.  This article will explain the technique I use to create different and appealing schemes for my customers and also for my own aircraft. This article will explain the technique I use to create different and appealing schemes for my customers and also for my own aircraft.
First let’s discuss some of the tools used to create the scheme. One I like to use is a three-view drawing, usually available from the kit manufacturer. Many common aircraft three-views are available on the Internet. I usually go to an office supply store and have them enlarge the page to about 10” x 14” with one view per page. I get several copies, so I can mix and match ideas to come up with something that appeals to me. I use a French curve set, a straightedge and a simple drawing pencil to start sketching out ideas. Don’t be afraid to incorporate other people’s schemes into your new project. After I have several drawings, I start mixing and matching to fuse designs for wing and stab schemes. Once I find one I like, I usually ask several friends if they like any of my ideas. Once my decision is made, I go back to the office supply store and have them enlarge my drawings to the full size of my aircraft (unless I feel I can duplicate the scheme in a enlarged version). While these drawings are being enlarged, I start using colored markers to come up with a color scheme. I usually have several copies made of this drawing, as I like to see what colors look the best on paper. I try to imagine what the aircraft will look like and how it will present in the air. When I get the enlarged copies back, I use a #11 hobby knife to cut out arcs and curves, using a single-edge razor blade and straightedge to make straight lines. If I don’t use the office supply store to enlarge the drawings, I like to use large sheets of paper (or even the back side of old aircraft plans) to draw out the full-size templates of the schemes.
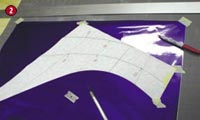
When making these new templates, I mark which edges will have to be ¼” larger to accommodate the overlap of the colors of the scheme. I also label the colors for each part at this time. Depending on the complexity of the scheme, you may end up with many templates that can easily be confused with each other, so labeling where each one goes, along with its colors, will prove to be very helpful.  I use small pieces of masking tape to place the templates on the covering, which is taped to my covering table with a few small pieces of the same tape. A good self-healing cutting mat is nice here but isn’t necessary. The template is used only as a guideline to make each piece as close to the template as possible. If I start to move off the guideline, I simply hold this line and continue cutting and working the cut back to the template. The key here is to keep the blade moving and the cut smooth until you finish each line. Once the pieces are cut, transfer the templates onto the prepared aircraft surface with a drawing pencil. These pencils are very soft and will mark the balsa wood without denting or leaving any distinguishing mark after being covered over. Then mark each piece out on the fore-attached piece with a fine line marker. I try to maintain a ¼” overlap when placing colors and always try to lay down lighter colors first. When covering balsa wood, use the Hangar 9® Covering Glove and Sealing Sock to prevent marking the surface. I use small pieces of masking tape to place the templates on the covering, which is taped to my covering table with a few small pieces of the same tape. A good self-healing cutting mat is nice here but isn’t necessary. The template is used only as a guideline to make each piece as close to the template as possible. If I start to move off the guideline, I simply hold this line and continue cutting and working the cut back to the template. The key here is to keep the blade moving and the cut smooth until you finish each line. Once the pieces are cut, transfer the templates onto the prepared aircraft surface with a drawing pencil. These pencils are very soft and will mark the balsa wood without denting or leaving any distinguishing mark after being covered over. Then mark each piece out on the fore-attached piece with a fine line marker. I try to maintain a ¼” overlap when placing colors and always try to lay down lighter colors first. When covering balsa wood, use the Hangar 9® Covering Glove and Sealing Sock to prevent marking the surface.
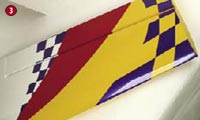
 Checkers are another attractive addition to any aircraft. I start these out the same way as any scheme; they must be drawn out first and then increased to the correct size. Lay the template out on the oversized piece of covering, which is taped down on the cutting surface with a few small pieces of making tape, as mentioned before. I make hash marks on all lines outside of the template and make small cutouts in the templates to mark the location of any arced checkers. After these hash marks are laid out, I use fine line tape as a guide (or freehand the lines with a fine line marker) onto my paper template. The trick now is to cut out the checkers with a hobby knife without going through the paper backing. I use a straightedge or fine line tape here, again aligning the straightedge onto my hash marks and then, with great care, just cutting through the covering. This will allow you to lay out the covering on your wing or fuse in perfect alignment, as you can use your template to lay out the scheme on the aircraft surface, and then apply the UltraCote® with a low-temp setting on Hangar 9’s Teflon-sealed ProSeal™ Covering Iron. After applying all of the pieces, I then go over them with a high temperature to finalize the application using the Sealing Sock to prevent marking. I lay out my checkers over the top of a base color, which would have been applied on the original scheme. Checkers are another attractive addition to any aircraft. I start these out the same way as any scheme; they must be drawn out first and then increased to the correct size. Lay the template out on the oversized piece of covering, which is taped down on the cutting surface with a few small pieces of making tape, as mentioned before. I make hash marks on all lines outside of the template and make small cutouts in the templates to mark the location of any arced checkers. After these hash marks are laid out, I use fine line tape as a guide (or freehand the lines with a fine line marker) onto my paper template. The trick now is to cut out the checkers with a hobby knife without going through the paper backing. I use a straightedge or fine line tape here, again aligning the straightedge onto my hash marks and then, with great care, just cutting through the covering. This will allow you to lay out the covering on your wing or fuse in perfect alignment, as you can use your template to lay out the scheme on the aircraft surface, and then apply the UltraCote® with a low-temp setting on Hangar 9’s Teflon-sealed ProSeal™ Covering Iron. After applying all of the pieces, I then go over them with a high temperature to finalize the application using the Sealing Sock to prevent marking. I lay out my checkers over the top of a base color, which would have been applied on the original scheme.
Always remember: the trick to making any curved, arced or even straight-lined scheme is to keep the knife moving while cutting the covering and to make the lines as smooth as possible. This is art you are creating on your airplane, so be creative and have fun.
|